How to Do the Machine Row
![]() By Zachary, builder of Mariposas · Reviewed against published exercise-science sources (references)
· Last updated June 2026
By Zachary, builder of Mariposas · Reviewed against published exercise-science sources (references)
· Last updated June 2026
The machine row earns its place in a back program because it isolates the mid back and lats with a fixed movement path that removes the balance and bracing demands of free-weight rows. That stability means you can push closer to muscular failure on every set without technique breaking down the way it tends to with a barbell or dumbbell. It is especially useful for lifters who struggle to feel their lats engage during cable or free-weight variations, since the machine's guided arc keeps the elbows traveling in the exact plane where the lats do the most work. You can log every set and track your progress on the machine row for free in the Mariposas app.
How to do it
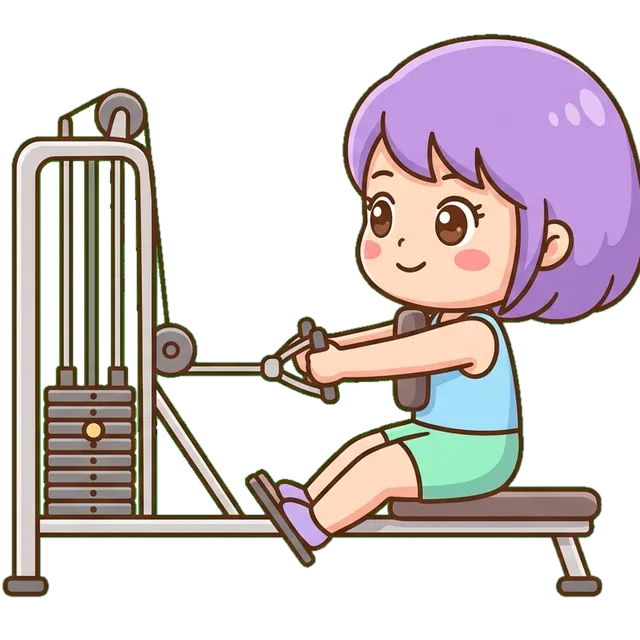
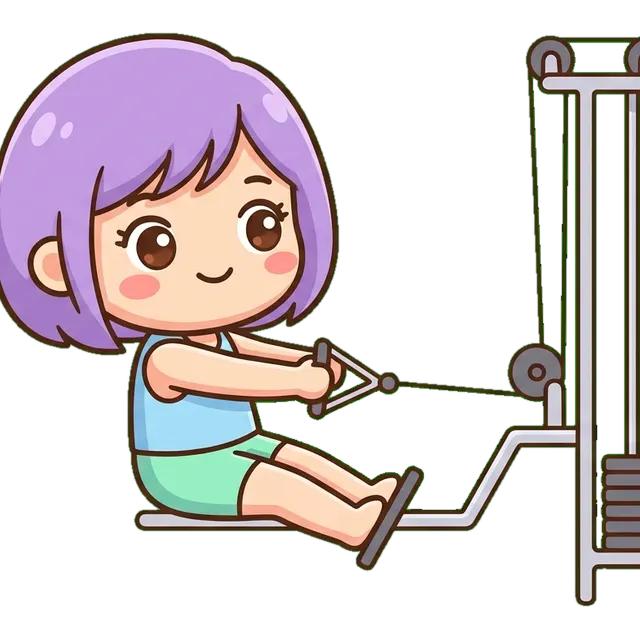
- Sit down facing the machine and set the seat height so the handles are roughly at mid-chest level when your arms are fully extended, which positions the pull directly through the lat fibers rather than above or below them.
- Plant your feet flat on the footrests or floor and brace your torso against the chest pad firmly enough that your lower back stays neutral throughout the set rather than rounding or hyperextending to generate momentum.
- Grip the handles with a neutral or pronated grip depending on what the machine offers, keeping your wrists straight and your grip firm but not white-knuckled, so tension stays in the back rather than the forearms.
- Before pulling, take a breath and create mild tension through your core, then initiate the movement by driving your elbows back and slightly down rather than thinking about squeezing your hands together.
- Pull the handles toward your lower ribcage or upper abdomen, keeping your elbows close to your sides throughout the arc so the lats stay loaded rather than the movement drifting into a shoulder-dominant shrug.
- At the fully contracted position, pause for a count of one and actively try to press your shoulder blades toward each other and toward your back pockets simultaneously, which deepens the mid back contraction.
- Control the return over two to three seconds, letting the weight stack separate your shoulder blades fully at the end of each rep so the lats get a genuine stretch before the next pull.
- Reset your breath and brace before each rep rather than bouncing out of the stretched position, which keeps the mid back and lats under tension for the full set.
Form cues
- Elbows back, not out. Keep them pinned to your sides the whole way.
- Lead with the elbow, not the hand.
- Chest stays on the pad. No rocking.
- Squeeze and hold at the back. Don't let momentum do the job.
- Slow the negative. Two counts back, minimum.
Common mistakes
- Using too much weight and letting the torso rock off the chest pad generates momentum that shifts the load away from the mid back and lats onto the lower back; drop the weight until you can hold the pad contact throughout.
- Flaring the elbows out wide during the pull turns the exercise into a rear-delt movement and reduces lat tension significantly; focus on keeping the elbows traveling in a straight line parallel to the floor.
- Rushing through the eccentric by letting the stack crash back means the mid back misses its lengthening load, which is where a lot of the muscle-building stimulus lives; control every return deliberately.
- Shrugging the shoulders upward at the end of the pull is a sign the traps are compensating because the seat is too high or the weight is too heavy; lower the seat or reduce the load so the pull stays horizontal.
- Gripping too hard and pulling with the hands instead of the elbows causes forearm fatigue to become the limiting factor before the lats and mid back are adequately worked; lighten the grip pressure and think of your hands as hooks.
Why do the Machine Row?
- The fixed path makes it straightforward to add small amounts of load each week, which provides the progressive overload the mid back and lats need to grow without needing to re-learn coordination as the weight climbs.
- Because it removes the need to stabilize a free weight, it is a reliable option for finishing a back session when the smaller stabilizing muscles are already pre-fatigued but the target muscles still have capacity left.
- The chest pad eliminates the temptation to use lower-back extension for momentum, so the mid back and lats receive more direct stress per rep compared to many unsupported free-weight rows where momentum creeps in.
- For lifters rebuilding after a lower-back issue, the supported position allows continued lat and mid back training with significantly reduced spinal loading compared to bent-over barbell variations.
Machine Row variations
- Chest-Supported Dumbbell Row
- A good regression when the machine is occupied or when a lifter wants to develop unilateral lat awareness before returning to the bilateral machine version.
- Single-Arm Machine Row
- If the machine allows it, training one side at a time exposes and corrects strength imbalances between the left and right lat and mid back.
- Cable Seated Row
- A progression that adds a stability demand at the torso and allows the cable angle to be adjusted, making it useful once the lifter has built a strong mind-muscle connection on the machine.
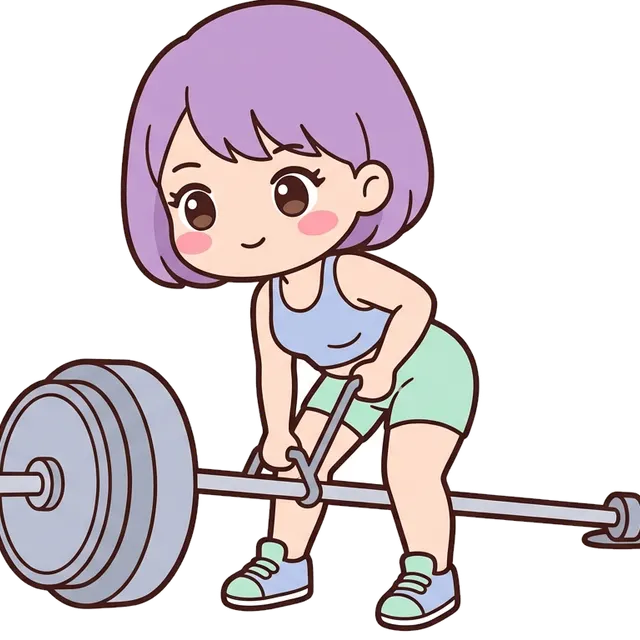
- Pendlay Row
- A free-weight progression for more advanced lifters who want to add hip hinge loading and full-body tension to their horizontal pulling.
How to program it
Most people use the machine row in the 8 to 15 rep range, where the controlled path makes it practical to push close to failure safely. It tends to appear after a heavier compound movement like a barbell row or weighted pull-up, functioning as an accessory lift rather than the primary strength stimulus for the session. Some hypertrophy-focused programs place it at the very end of a back day as a high-rep pump set in the 12 to 20 range, taking advantage of the machine's safety when fatigue is already high. Strength-focused athletes occasionally use it in lower rep ranges to practice scapular retraction under load without the technical demands of a barbell.
Machine Row alternatives


FAQ
- What muscles does the machine row work?
- The machine row targets the mid back and lats as the primary movers. The mid back musculature handles scapular retraction at the end of the pull, while the lats drive the arm backward and downward throughout the range of motion.
- Is the machine row as effective as the barbell row?
- For directly loading the mid back and lats, many coaches consider them comparable in terms of muscle stimulus. The machine version removes lower-back and core involvement, which means more isolation but less total-body demand. Each has its place depending on what the rest of the program is doing.
- How do I feel the machine row in my lats and not just my arms?
- Focus on initiating the pull by driving your elbow back rather than squeezing your hand. Before you grip, think about where your elbow needs to travel and let your hand follow. Slowing the eccentric and pausing at the contracted position also helps build the neural connection to those muscles.
- Should I use a neutral grip or an overhand grip on the machine row?
- Neutral grip (palms facing each other) tends to allow a slightly longer range of motion and is easier on the wrists and elbows for most people. Overhand grip increases the external rotation demand and can increase mid back involvement at the top of the contraction. Try both and use whichever lets you feel the target muscles working most clearly.
- How much weight should I use on the machine row?
- A useful test is whether you can complete your target reps with a full pause at contraction and a controlled return without letting your torso lift off the chest pad. If the pad is separating from your chest before you finish the set, the load is likely too heavy for where your technique currently is.